The Zone System as developed by Ansell Adams and Fred Archer
From the course notes, "The Zone System is a way to visualise how the tones visible in a scene can be most effectively rendered onto a photographic negative." They contrived an eleven point scale where 0 is absolute black and 10 is pure white.
This is still relevant today in digital colour photography for better handling the differences in contrast within a scene. Therefore, pre-visualisation of the end product is required, and more careful assessing of the scene which first attracts you. In this way it will help avoid blown out highlights and detail free shadows. The point made is that, in Landscape photography, more than in other disciplines (Portrait, Street,Wildlife), a more critical view is taken and there is less forgiveness for technical mishaps.
Ansel Adams' description of zones (geared towards black and white printing)
Low values
Zone 0 Complete lack of density in the negative image, other than film base density plus fog. Total black in the print.
We will omit zone 0 from the remainder of this tutorial; zone 1 will be considered pure black.
Zone 1 Effective threshold. First step above complete black in the print. Slight tonality, but no texture.
Zone 2 First suggestion of texture. Deep tonalities, representing the darkest part of the image in which some detail is required.
Zone 3 Average dark materials. Low values showing adequate texture.
Middle values
Zone 4 Average dark foliage. Dark stone. Landscape shadow. Recommended shadow value for portraits in sunlight.
Zone 5 Clear north sky (panchromatic rendering). Dark skin. Gray stone. Average weathered wood. Middle gray (18% reflectance).
Zone 6 Average Caucasian skin value. Light stone. Shadows in snow in sunlit snowscapes.
High values
Zone 7 Very light skin. Light gray objects. Average snow with acute side lighting.
Zone 8 Whites with textures and delicate values (not blank whites). Snow in full shade. Highlights on Caucasian skin.
Zone 9 Glaring white surfaces. Snow in flat sunlight. White without texture. (The only subjects higher than Zone 9 would be light sources; they would be rendered as the maximum white value of the paper surface.
(from www.luminous-landscapes.com Zone system tutorial)
Practical Advice from The Outdoor Photographer Magazine, Werner Publishing Corporation
"Start by picking the most important highlight—the brightest significant part of the scene that needs to have detail and texture. Then decide what zone that highlight should be. There are really only two choices. Zone 5 isn’t a highlight, it’s a midtone, while Zone 8 is washed out. So that leaves Zone 6 or Zone 7. Use Zone 7 for objects that are white or nearly white, like white water, snow, light sand or very light rock. Use Zone 6 for any other highlight, including tans, yellows or other pastel colors."
"Start by picking the most important highlight—the brightest significant part of the scene that needs to have detail and texture. Then decide what zone that highlight should be. There are really only two choices. Zone 5 isn’t a highlight, it’s a midtone, while Zone 8 is washed out. So that leaves Zone 6 or Zone 7. Use Zone 7 for objects that are white or nearly white, like white water, snow, light sand or very light rock. Use Zone 6 for any other highlight, including tans, yellows or other pastel colors."
Exercise 1.8: Zone System in practise.
Demonstrate awareness of the Zone System and your ability to take accurate light readings by producing three photographs taken in relatively high dynamic range (contrasting light conditions). Make sure that your exposure choice renders as much detail as possible in the brightest and darkest areas of the photograph. Collate and reflect on the results.
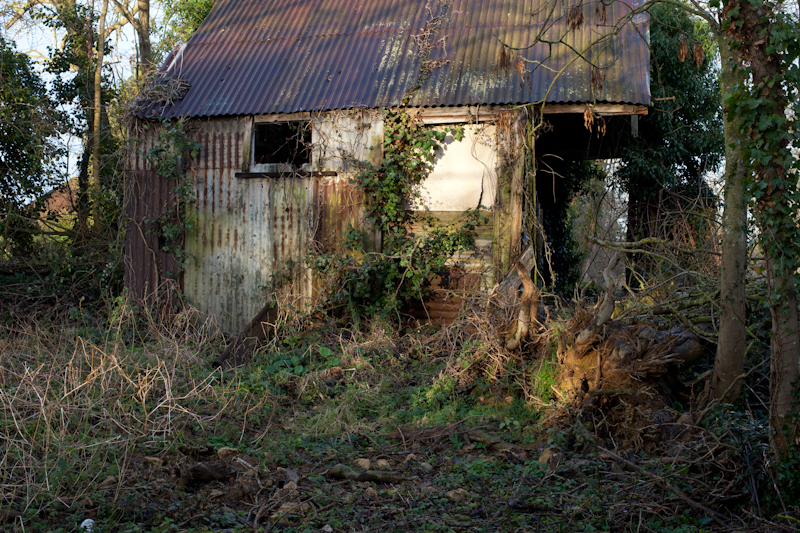
This was an unevenly lit scene on a bright evening.
I made the exposure according to metering the bright 'window'. The sky and the darker parts of undergrowth both showed clipping at either end of the histogram. In the RAW converter, subtle changes to Recovery, Exposure and Fill sliders were enough to expand the range without losing detail.
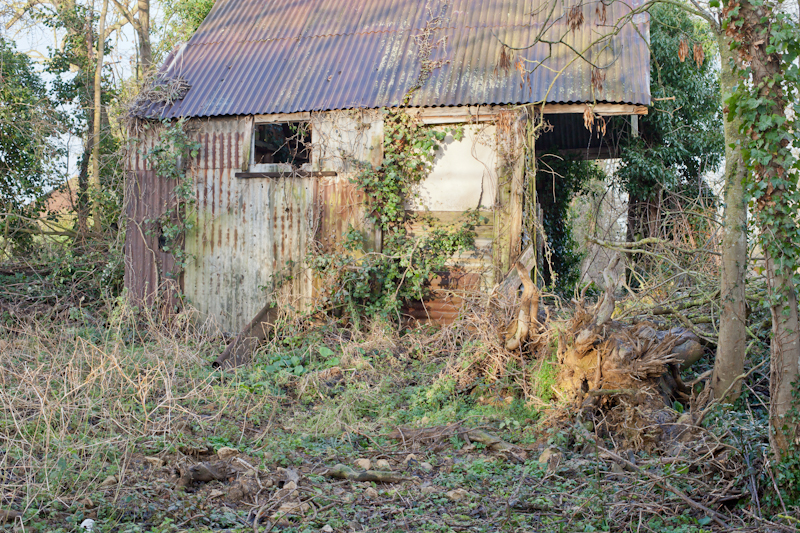
The edited image
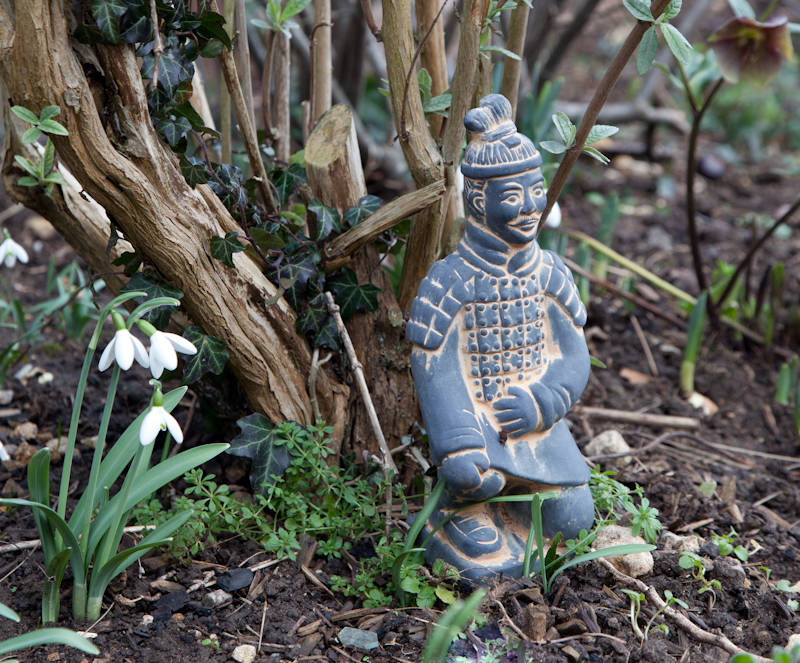
This image was taken on an intermittently dull/bright day. I chose the snowdrops to be the brightest part of my image and exposed accordingly. In this dull lighting, using Fill slider I could show detail in the dark areas without increasing noise. See below.


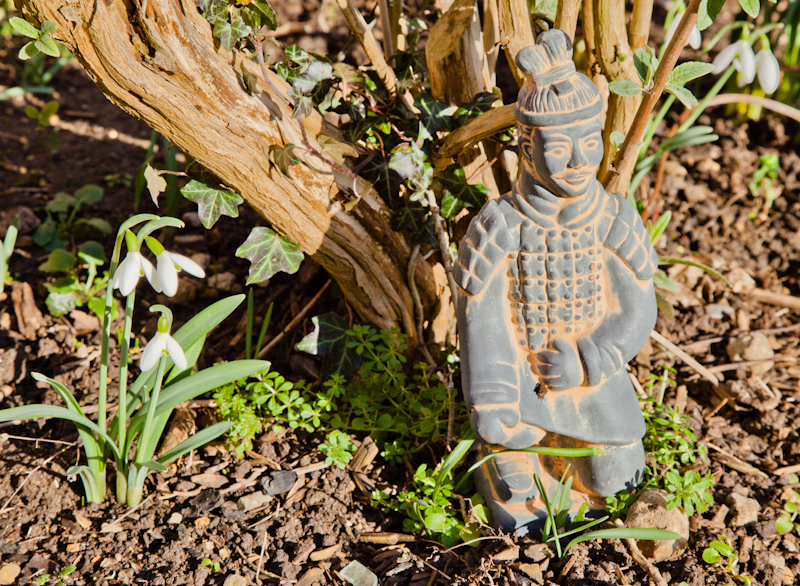
The same scene as above was exposed again for the snowdrops, but with the sun shining. The result was a much more contrasty image with a different colour cast.
In the edited version below, I have been able to open out the shadows but with a cost of increased digital noise. There is a loss to the colour of the figure. Although I believe this could be recoverable in Photoshop it demonstrates that a very contrasty scene is best avoided.
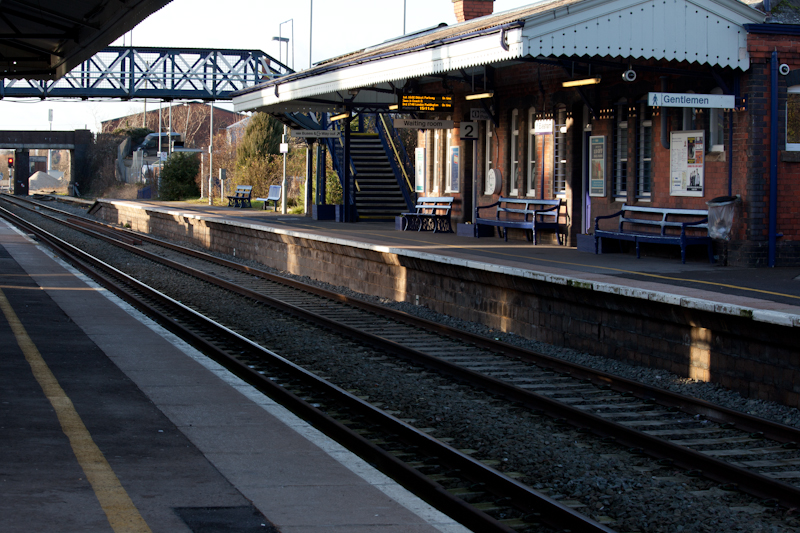
The contrast was quite strong here with sunlit white paint and shadow under the roof. I used the spot metre function on the camera and exposed for a positive compensation of up to one stop for the sun-lit white paint. Although on the camera back screen it showed that area and the sky burnt out, it was possible to easily recover detail in the RAW processor as shown below, using Recovery and Fill sliders. The shadow was not so dense that using the Fill slider degraded
the shadows with much digital noise.
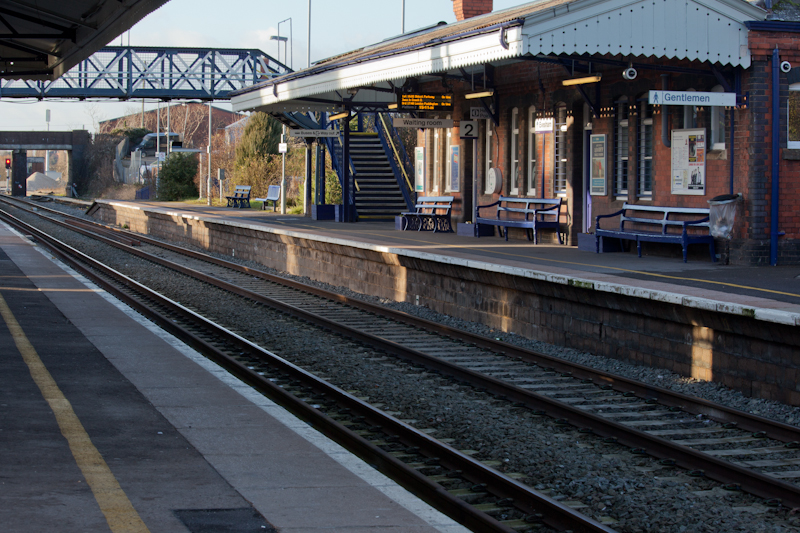

I finally converted the same image into monochrome. There is a wide spread in the histogram which indicates a good range of tones without clipping in the whites or blacks. Although the zone system was originally for monochrome prints, it seems to be just as important in colour pictures too as an aid to get good detailed exposure across the range of tones.
